


MyCourses: Groups and groupings

In short
- Groups can be Sisu-based or created in MyCourses.
- Groups are used, for example, in discussions, language selection, group assignments, or to restrict tasks or materials for a group.
- A Grouping is a collection of groups within a course. When creating groups, always connect them using the "grouping" functionality.
- You can populate groups automatically or manually, or let students choose groups using the Group Choice activity.
- Access Groups and Groupings via the Participants page in the course navigation: open Participants, then use the drop-down at the top to switch to Groups or Groupings.
Sisu-based groups
When a course is created in Sisu, groups are automatically formed for lectures and exercise sessions, labeled as 'L01 Sisu' or 'H02 Sisu', for example. These Sisu-based groups are copied to the MyCourses workspace, and they must be managed via Sisu.
Students register for both the course and groups using Sisu. For students, Sisu groups appear in their personal MyCourses calendar, showing only the information relevant to their own groups. To maintain student enrollments in the course, Sisu groups should not be deleted from MyCourses.
Important: Even if your workspace contains only one Sisu-based group, you must still use "Grouping" when creating your own groups.
Automatic creation of multiple groups
You can automatically create several groups simultaneously. Assign a name to the group that ends with either @ or #. The @ symbol indicates that the groups are named alphabetically (group a, group b, group c, ...), while the # symbol indicates that the groups are numbered (group 1, group 2, group 3, ...).
Step-by-step groups creation:
- Open Participants from the main course page.
- Select Groups from the dropdown menu.
- Under the "Manage" heading, select Auto-create groups.
- Enter a name for the groups under the Naming scheme and select either '@' for alphabetic group names or '#' for numeric group names. For example, "Rehearsal Group#".
- Select either the total number of groups you wish to create or specify the number of members per group.
- Under Group members, you can choose how to allocate members:
a. Randomly: Automatically assign students to groups at random.
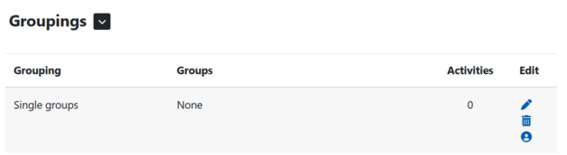
b. No allocation: if you want students to select their groups (using Group choice activity), or you prefer to allocate members manually. - Always add a Grouping! Open the Groupings section at the bottom of the page, select New grouping, and assign a name. Grouping clusters the groups you have created, and it allows you to specify which set of groups (grouping) to use for each activity. The workspace can contain multiple groupings.
- You can preview the groups before saving.
Read more:

Creating a single group and renaming it
Additionally, you can manually create groups one by one and assign each a unique name, for example, for themed groups, especially if you let students choose their groups via the Group selection activity.
When creating groups individually, ensure you add them to a grouping. You can add a group to a grouping using the "person" icon.
Step-by-step for creating a single group:
- Navigate to the course main page and open "Participants."
- From the dropdown menu, select "Groups."
- Under the "Manage" heading, choose Create group, assign a name, and save.
- Open Grouping from the Participants page menu, create a grouping, name it, and save.
- Add the groups you created to the grouping by clicking the person icon. Select the groups from the right box and add them to the grouping (left box).
- If you need to change the group names, click on the group name and select "Edit group settings" located below the group table.
Adding students to groups
When you auto-create groups, you can simultaneously assign students to the groups.
Populate groups manually
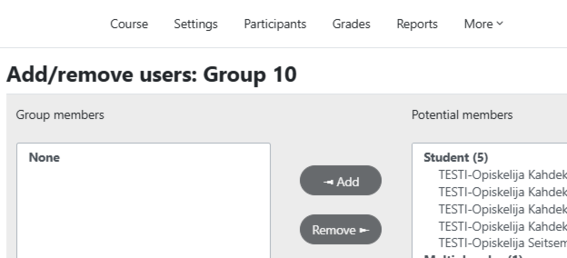
In the Groups tab, choose the group to which you want to add members, and click Add/remove users. From the box on the right, select the person you wish to add to the group, then click Add. To remove someone, highlight their name and click Remove.
To select multiple users at once, hold down the CTRL key while clicking the desired users, then click Add. To return, click the black button labeled Back to groups.
Group choice activity - let students choose their own groups
With the group choice activity, students have the autonomy to choose which groups they wish to join from the options provided. This feature can be useful for tasks where groups are organised based on topic or schedule.
Step-by-step guide for Group choice activity:
- Select "Add activity or resource" and then choose "Group choice." Ensure you have created at least two groups for this activity to function properly.
- Name the activity and describe if desired.
- In the Publish results choice, you can choose to display to students who are in each group.
- You may enable updates for students to change their group, for example, if they make a mistake. However, it's recommended to disable this option once the work begins.
- You can set a limit on the group size ("Limit the number of responses allowed").
- From the Available groups box on the left, select the grouping you want to use and click Add grouping. The groups will then move to the "Selected groups" box on the right.
- You also have the option to limit the response time, preventing students from changing their group after a set period.
- Save and display.
Group members: displaying group members to students
As the Participants listing is not accessible to students, there may sometimes be a need to show who belongs to each group. This is where Group members function is handy.
Ensure that there are already groups in the course.
- Click + Add activity or resource → select Group members.
- Enter a name and description.
- Choose which grouping's group members to show and decide what information on students should be visible.
- Save.
Use this feature when there is a clear need to inform students of their group membership and who their fellow group members are.