


MyCourses: Adding resources

In short
- Resources are teaching and instructional materials added by the teacher for students.
- Resources include, among other things, pages written in the workspace, lecture slides, files, attachments, instructions, and links to external materials.
- Name the materials descriptively.
- Consider copyrights, permissions, and data protection when using the materials.
- You can restrict access to the resources in the workspace.
Permissions and copyrights
It is not permitted to upload or share content on the MyCourses service or any learning environment without the author's permission. If you are unsure about the licences, please contact support before uploading content.
When creating content, we encourage you to add a licence label (Creative Commons licence) to the material so that users of the content know how it can be used.
Copyrights, publishing, and licensing
- Aalto.fi: Researcher's guides: Copyrights and licensing
- Aalto.fi: Open access publishing
- Aalto.fi: Open content licenses - Creative Commons
- Kopiosto: The ABC of copyright
- Information about image copyrights on the ImagOA Open science and images page: http://libguides.aalto.fi/imagoa_eng.
Personal data protection instructions
- Aalto.fi: Processing of personal data - Studies (Not published yet)
- Aalto.fi: Privacy notices
Adding resources: Page, File, Folder
Resources (or materials) include pages written in the workspace, lecture slides, files, attachments, instructions and links to external materials.
Start adding activities and materials by enabling Edit mode from the top menu (upper right corner). In each section of the workspace, you'll see a + icon located above and below every activity, which you can use to add new activities or resources.
To easily access frequently used resource types and activities, you can mark them as favorites by clicking the star icon, allowing you to find them on a separate tab.
From the same + icon, you can also add a sub-section beneath the main section.
Adding materials step by step
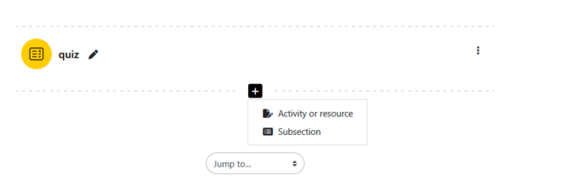
- Click the + icon, and select Activity or resource.
- Select Resources tab and choose the desired one, e.g., Page, File, Folder. Each material has an i-button that provides additional information on its usage.
- Name the resource descriptively and add the material.
When adding files, you can either drag and drop the file or click the file field to open the file menu, or you can drag and drop files directly into the middle column of the workspace.
It is advisable to use folders if multiple files can be grouped under the same title.
- You can either drag and drop files into the folder or click the white square to open the file selection
- It is also possible to add subfolders.
Page-type material can contain text, images, audio, videos, web links, and embedded HTML code. The page is created directly in the text editor. The advantage of the page compared to the file is that it is easier to update.
Note! Store your videos first on Aalto's video service Panopto.
Read more:
- Panopto video service.
- Moodle.org: Resources

Interactive materials
Interactive materials engage participants and, when used correctly, increase the sense of engagement and the absorption of content. You can create interactive materials using H5P activities, Panopto videos, or ThingLink service.
Read more: Media tools in teaching
Adding a sub-section
In MyCourses, a new element called a sub-section can be added under the main section. You can collect related sub-topics in the sub-section, such as reading materials.
You can add a sub-section by clicking on the + sign after each activity or resource -> select Sub-section

Student folder
Assignment submissions are visible only to the teacher. If you want to share students' submissions, you can use the Student Folder activity. Note: It is important to obtain students' permission before making their submissions public. Ensure to inform them of this requirement when assigning the task.
Students can upload their files to the student folder, which can be made visible to other students either immediately after uploading or after teacher approval. The folder can be used to share documents from the Assignment activity. In this case, teachers can decide which files are visible to all participants or nominate individual students to release files.
- Open Add an activity or resource from the bottom of the section.
- Select the Student folder from the Activities tab.
- Name and describe the folder.
- Make the necessary settings:
- Will files be imported directly or from some assignment files
- the number of files allowed per student and the maximum size
- Will the teacher publish the files, or will they be published immediately upon saving
- file upload time
- possible notifications to the teacher and/or student
- visibility restriction e.g. to course participants or a specific group.
Read more:
Internal and external links in the workspace
You can create automatic internal links within the workspace as well as links outside the workspace.
Automatic linking, i.e., internal linking within the workspace
It is possible to enable Automatic linking of activity names, allowing any activity or resource name to be recognised and converted into a direct link. For example, typing 'Announcements' in any description field creates a link to the Announcements discussion area. Automatic linking is a workspace-specific setting.
- Open the Main course page of the workspace and go to the More tab.
- Open the menu and choose Filters -> Activity names auto-linking and select On.
Linking to external material (URL)
- Click Edit --> Add activity or resource --> select URL from the Resources list.
- Alternatively, click Add activity or resource --> Select Page --> Copy and paste the link list into the page content field.
Linking a file to multiple workspaces
If you use the same file in multiple workspaces, you can use the Private files feature to link them. In this case, the file will be automatically updated in all workspaces if you change it through the Private files directory.
- First, add the file from the top right corner under your name/picture by using the small arrow dropdown menu Private files -> Add file -> Save.
- In the course workspace, Add activity or resource -> name the file -> click the box for file addition -> In the file selector, choose the desired file from Private files -> Save.
- If you want to make a change to the file, do it through the Private files directory.
Allow downloading of course content
You can allow students to download all course files from a single link. Open the Course main page and Settings. Activate the Enable download course content. If downloading course content is enabled, students will see a Download course content link in the course navigation under More, on the Main course page. It will create a zip file.