


Creating a Scheduling Poll in Outlook
Scheduling Poll simplifies the process of finding a meeting time by allowing you to send a poll to participants both inside and outside the organization. Instead of exchanging multiple emails, attendees can simply vote on which meeting times work best for them.
Using Scheduling Poll in Outlook is recommended over external tools such as Doodle, as IT Services cannot support external tools, and their data protection and security have not been reviewed. By using Scheduling Poll, you keep meeting and personal information in one secure place that is already approved and supported. Read more about why you should not use tools that have not been approved or security-checked here.
Creating a Scheduling Poll in Outlook - Via email and calendar
If you want to create a Scheduling Poll in Outlook, you can do it either via email or calendar.
Via email
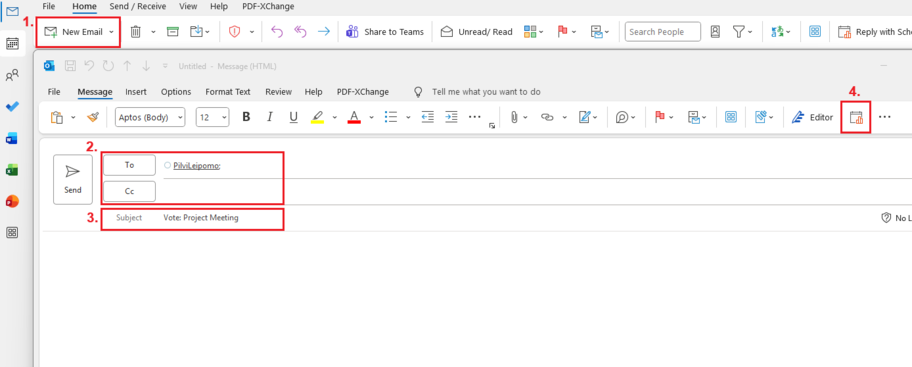
1. Select New Email or an email to reply to.
2. List required attendees in the To field and optional attendees in the Cc field.
3. Add a title for your scheduling poll in the Subject/Title field (can also be added after creating the poll).
4. Select Scheduling poll in the Message tab.
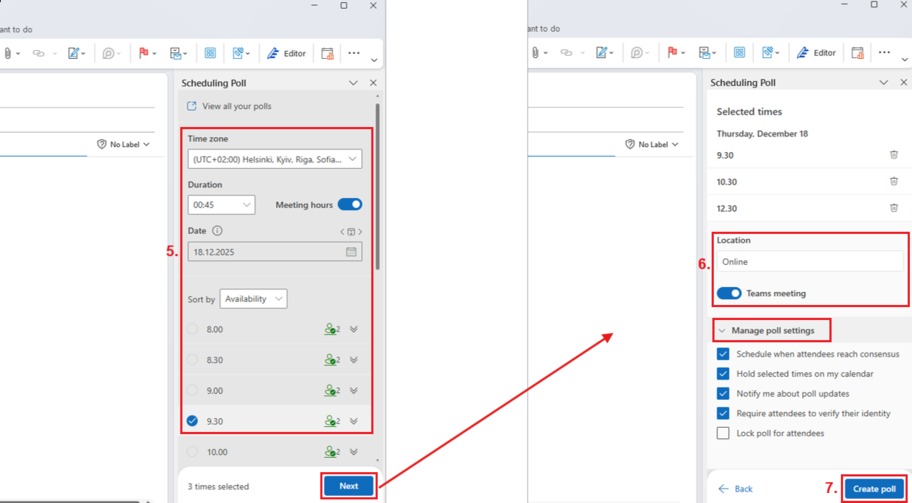
5. Select the time zone and duration and then select the dates and times that you would consider for your meeting. Click Next.
6. Add the location for your meeting. You can also manage poll settings under “Manage poll settings”.
7. When all details are added, select Create poll.
8. Select Send to send the scheduling poll to attendees.
9. Access your poll from the View all your polls-link in the email you sent in step 8. If needed, you can also add and delete time options via the link.
Via calendar
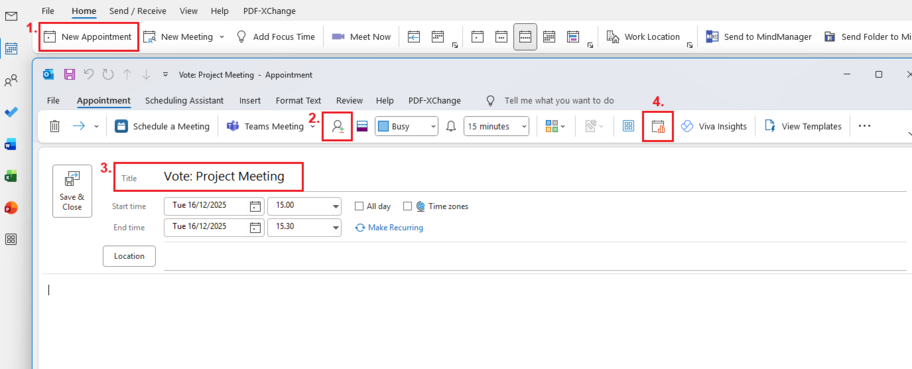
1. Select New Appointment.
2. Add attendees by clicking Invite Attendees. List required attendees for the meeting in the Required field and optional attendees in the Optional field.
3. Add a title for your scheduling poll in the Subject/Title field (can also be added after creating the poll)
4. Select Scheduling poll in the Appointment tab.
5. Follow steps 5-9 in the email instructions above. You can delete the appointment draft made in step 1 after creating your poll.