Adding a printer (Windows)
Aalto University printing services are renewed in November - December 2024. The new printing system is provided by Ricoh. The current Canon printing system and devices will be phased out.
These instructions are for the Canon printing system.
Classroom computers maintained by Aalto IT have a printer pre-installed, but at the various departments users must install a printer on a workstation.
Follow the instructions below to add a printer to a Windows 10 workstation.
Windows 10
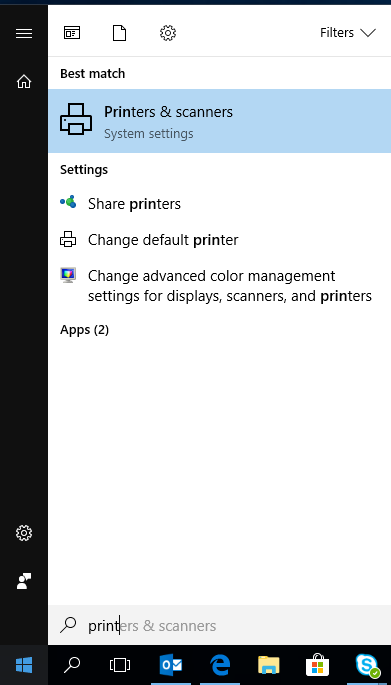
1. Open the Start menu and find Printers & scanners (see image below).
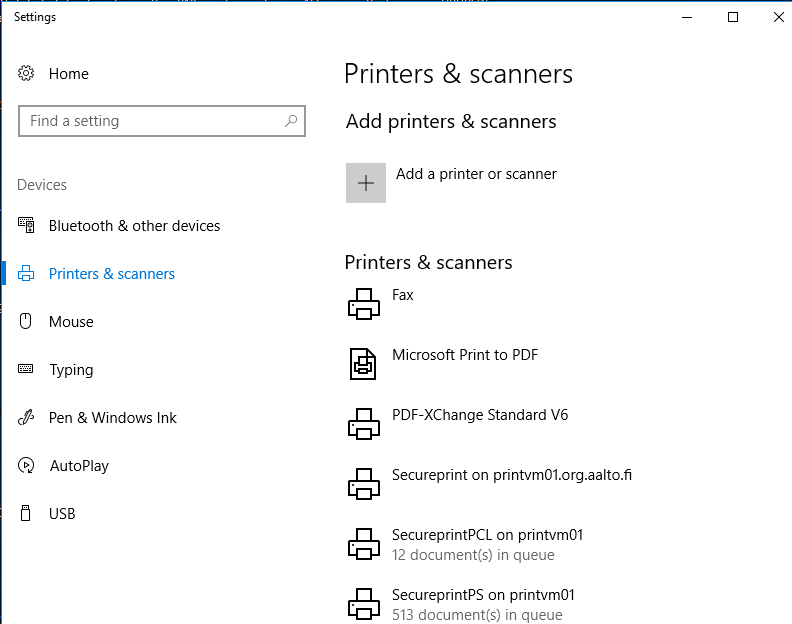
2. Select Add a printer or scanner.
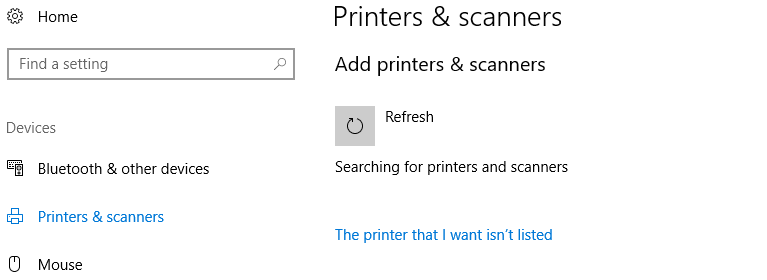
3. Then click The printer that I want isn´t listed (see image below).
4. Find a printer in the directory, based on location or feature.
5. The printer has now been added to the Windows 10 workstation.
6. Aalto’s Windows 10 workstations have a Secureprint print queue pre-installed. If it is missing from the workstation for some reason, the queue can be found in the path \\printvm01\secureprint (see image below).
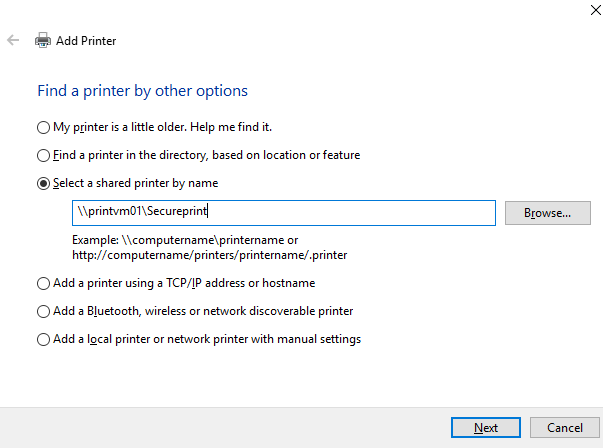
If you are using a printer or multi-function device that does not have a card reader, print queues can be found on the server: \\printvm02\queue-name (see image below).
If you are using a so called legacy printer, print queues can be found on the server printvm-legacy2.org.aalto.fi.
Standalone Windows10 printing from the Aalto network
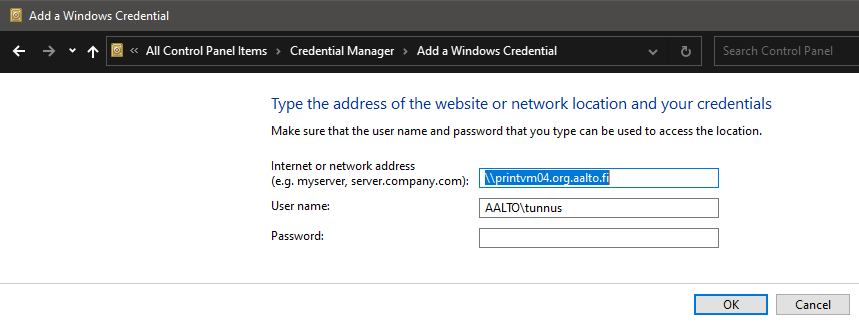
Add the credentials to Windows Credential Manager beforehand.
- Internet or network address: \\printvm03.org.aalto.fi (or \\printvm04.org.aalto.fi )
- User name: AALTO\youraaltousername
- Password: (Your Aalto password)
Related instructions
Printing at Aalto University
Read about printing at Aalto University
IT Services
- Published:
- Updated: